Driving Tips
Maintenance Tips
Buy / Sell Used Car Tips
Car Accident Safety Guide
Useful Tips
Maintenance Tips
Small Check Before You Drive

Conduct a small check before every time you start with your drive, which can make your drive safer:

  1. Walk around and make sure there are no obstacle(s) blocking the path.
  2. Check on the coolant while the vehicle is still cold, this can avoid overheating when the engine is running.
  3. Check for appropriate tyre pressure, sufficient tread, ask for professional advise in case of any problems found. Remember to check the spare tyre as well.
  4. Simple checking on the operation after starting the engine, such as lights, horn, braking etc, this can avoid any chaotic condition when driving.
Checking on Oils & Fluids

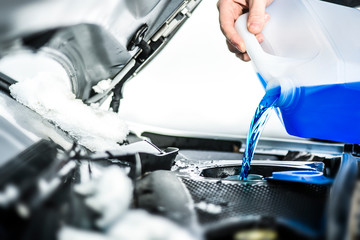
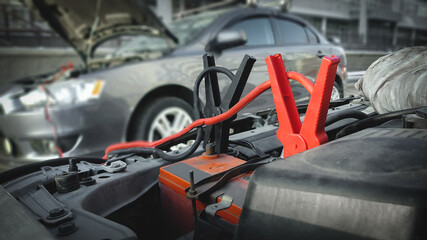
Checking on oils and fluids is one of the basic checking for owners. Those major oils & fluids include: engine oil, brake fluid, transmission fluid, battery electrolyte, windscreen fluid and coolant. Conduct a simple checking before driving can make your driving safer than ever, let’s work it out.


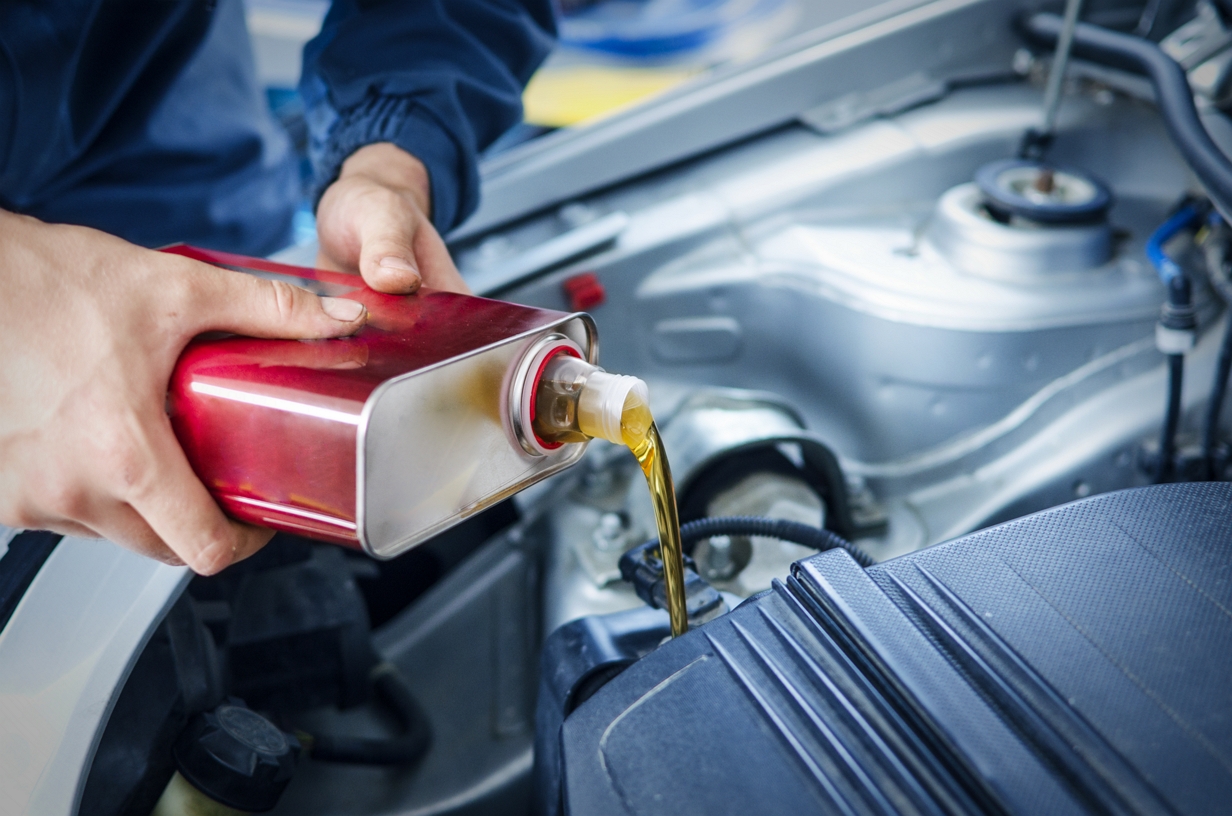
Checking on Oils - Engine Oil
  1. Switch off the engine for 3 minutes and have the oil returned;
  2. Pull out the engine oil level gauge;
  3. Clean the engine oil level gauge;
  4. Return the engine oil level gauge to its original position;
  5. Withdraw it again and read the marking. The marks should be between the marking "MAX" and "MIN".

**If the engine oil always falls below the level, the vehicle should be sent to service centre for detail checking.

 
Checking on Oils - Brake Fluid

Read the level on the bottle of brake fluid, it usually locates next to the brake pump

  1. Read the level of brake fluid, which should be between MAX and MIN;
  2. Also check on the clarity at the same time, make sure that it does not deteriorate.

**If anything extraordinary was found, please ask for professional advice immediately.


Checking on Oils - Transmission Fluid

Stop the car on a flat surface for checking the transmission fluid. Start the engine

  1. Generally, the transmission fluid level gauge locates near to the engine, in another colour;
  2. Braking when the engine in idling speed, moving the shifting knob from model P to L, passing all the locations, and finally fix it in P mode;
  3. Read the temperature gauge, ensure the coolant is under the appropriate working temperature ;
  4. Making reference to owner’s menu, ensure the checking on transmission fluid should be conducted when the engine is running or should be shutted down;
  5. Pull out the engine level gauge, clean it and return to its original position;
  6. Pull out the level gauge again and read the level;
  7. The transmission fluid should be level between "Min” & "Max”.

**If abnormal low level of transmission fluid was found, please ask for professional advise as leakage may happened

Checking on Fluid - Battery Electrolyte / Windscreen Fluid / Coolant
 
Checking on Fluid - Battery Electrolyte
  1. Check for the battery poles and bolts if loosen or any erosion;
  2. Check the level of battery electrolyte which should be between the "Upper” and "Lower” level;
  3. If it falls below the level, replenish with distilled water up to the "Lower” level;
  4. Tightened the cap after replenishment.
 
Checking on Fluid - Windscreen Fluid
  1. The windscreen fluid bottle is easy to locate, usually it is a big plastic bottle or a thin curved pipe, with its cap with a sign of wiper on it
  2. Check the level of windscreen fluid
  3. In case of low volume, refill with fresh water plus windscreen fluid
 
Checking on Fluid - Coolant

Just an eye checking on the level of coolant will be enough.

  1. Switch off the engine;
  2. Read the level of coolant, it should be fall between the level of MAX and MIN. When the engine heated, the coolant may come higher than the MAX level.

**It is not recommended to open the cap to avoid getting burned by pressure and hot coolant.

Air Cleaner Element Replacement

The air cleaner element is inside the air cleaner housing in the engine compartment.

  1. Loosen the bolt and clips, and remove the air cleaner housing cover;
  2. Remove the old air cleaner element;
  3. Carefully clean the inside of the air cleaner housing with a damp rag;
  4. Place the new air cleaner element in the air cleaner housing;
  5. Reinstall the air cleaner housing cover, tighten the bolt and snap the clips.
Spark Plug Replacement

The spark plugs in your vehicle should be replaced according the maintenance schedule recommended in the owner’s menu.

  1. Clean off any dirt and oil that have collected around the ignition coils;
  2. Use a wrench to remove a bolt holding the ignition coil. Remove the ignition coil by pulling it straight out;
  3. Disconnect the wire connector from the ignition coil by pushing on the lock tab and pulling on the connector. Pull on the plastic connector, not the wires;
  4. Remove the spark plug after the ignition coil was removed;
  5. Put the new spark plug into, then screw it into the hole;
  6. Torque the spark plug and tighten torque;
  7. Install the ignition coil, and reinstall the nut. Connect the wire connector to the ignition coil and push it down all the way;
  8. Repeat this procedure for the remaining spark plugs.
Changing Spare Tyre

If the case of tyre broken, stay clam. Changing tyre is no more than difficult, simply following the below steps.

  1. Stopping the car in a safe location, turn on the indicator lights. If the tyre broken when driving, stay clam, holding the steering wheel tightly, and having the car parked to roadside slowly. Change to P mode for A/T vehicle, while for M/T vehicle should change to 1st gear or reverse gear;
  2. Make sure it is safe before getting off, and take out gloves, spare tyre and all other necessary tools, get ready for spare tyre replacement;
  3. Loosen the bolts in cornerwise;
  4. Put the jack under the vehicle, lifting the car up to the level that the tyre has little contact with the ground slowly. Put the spare tyre under the car to avoid a sudden slipping. Remove the bolts afterwards;
  5. Further up lift the car with the jack up to having around 10cm from the ground, ensure there are enough room to put in the spare tyre. Remove the broken tyre and put it under the car, and put on the spare tyre;
  6. After put on the spare tyre, ensure the bolts are in correct position, tightening them in cornerwise. Since the car is still suspending, bolts cannot be completely tightened;
  7. Remove the broken tyre underneath and level down the car slowly with the jack. When the car returned to the ground level, completely tightening all the bolts in cornerwise;
  8. Finally put the broken tyre and all the tools back into the compartment, spare tyre changing is completed. At the meanwhile, the car must be getting back to service centre for a new tyre replacement as soon as possible.

Tips:
Q: Where should the jack be put?
A: The jack should be put under the marking indicated

Jump Starting

Have you ever forgotten to switch off the lights, used up the battery and made you can’t start the engine? If you face this situation, you may use the jumper cable to help you.

  1. Switch off all the electronic appliances in both collapsed vehicle and the sharing vehicle;
  2. Plug the positive electrode (red) of the jumper cable on the positive electrode of the collapsed vehicle battery, and plug another positive electrode (red) of the jumper cable on the positive electrode of the sharing vehicle battery;
  3. Plug the negative electrode (black) of the jumper cable on the negative electrode of the sharing vehicle battery;
  4. Plug the other negative electrode (black) of the jumper cable on the cylinder or contact point of engine earth wire of the collapsed vehicle (not on the negative of the battery);
  5. Starts the engine of the sharing vehicle first, and then the collapsed vehicle's, run for a couple of minutes;
  6. Remove the negative electrode (black) from the collapsed vehicle;
  7. Remove then negative electrode (black) from the sharing vehicle;
  8. Remove the positive electrode (red) from the collapsed vehicle;
  9. Remove the positive electrode (red) from the sharing vehicle;

After starting the engine, the collapsed vehicle needs to run for at least 20 minutes to recharge the battery.
**One must be very careful that the conductors of the jumper cable cannot be getting in touch with each other. Besides, the positive electrode of the jumper cable cannot touch any other electricity conduction area of the vehicle, short circuit may occurred otherwise.
**Ensure a proper fixing of the jumper cable, ensure that the cable will not be touching any whirling parts in the engine compartment.